Practical RV Interior Design & Renovation Ideas
Written by Milan Jara on 20th Aug 2025

Renovating an RV or camper van can be a rewarding way to make life on the road more comfortable and personalized. One of the biggest challenges is finding materials that are lightweight, durable, and easy to install in small spaces. That’s where products like styrofoam ceiling tiles and MirroFlex wall panels from DecorativeCeilingTiles.net come in.
In this post, we’ll explore practical RV interior design ideas you can use to refresh ceilings, walls, kitchens, and even showers. We’ll also cover RV interior remodeling ideas that fit small spaces, share lightweight product solutions, and highlight how to plan projects in phases without overloading your camper. Whether you’re looking for camper van interior design inspiration or a full RV interior makeover, you’ll find plenty of ideas here.
The Golden Rule of RV Interior Design: Keep it Light
RV interior design puts one thing first: weight - so, keep it light. Every bit of weight that you add is extra weight your engine has to haul wherever you go, and isn’t the whole point to travel far and wide?
Things like heavy wood paneling might look great in a cabin, but in an RV it can weigh you down (literally), taking money straight out of the travel budget, possibly resulting in less time spent on the road.
This is where lightweight materials like styrofoam ceiling tiles and MirroFlex wall & ceiling panels come in. They’re ultra-light, durable, and super easy to install - perfect for RV interior renovation ideas or camper van interior design projects.
From the Top Down: RV Interior makeover Ideas, Starting with the Ceiling
One of the most noticeable parts of your RV is the ceiling. Water stains, peeling fabric, surfboard marks or just plain boring finishes can make the whole space feel tired. Luckily, lightweight tiles offer plenty of RV interior decorating ideas that bring ceilings back to life and prepare it for many more miles to come.

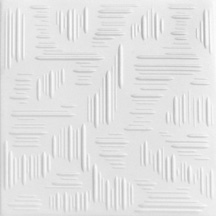
Styrofoam Ceiling Tiles
These 20x20" tiles are ideal for RV interior remodel ideas because they:
- Weigh next-to-nothing
- Are easy as it gets when it comes to installation
- They glue-up and are ready for action within just a couple of hours
- Can be painted to match your existing or RV interior design theme
- There’s the option to skip this step and order them finished a wide range of colors

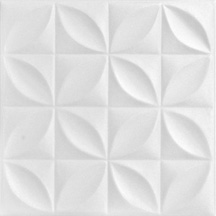

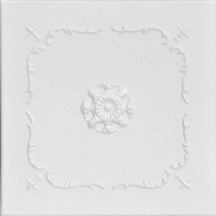
If you’re looking for some lightweight decorative ceiling tiles/panels that are a little more ornate, patterns like on our Bijou and Bee Bee tile add charm, while the Bourbon Street ceiling tile adds a more classic look. Both are a great design choice for RV interior makeover ideas when you want to upgrade your space quickly and affordably.


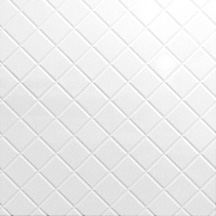
MirroFlex Panels for Ceilings
If you prefer a sleek, modern style, MirroFlex Ceiling Tiles are a great option. They’re another type of lightweight RV panel that work well for all types of motor-home remodeling, especially if you want a moisture-resistant, long-lasting ceiling upgrade that you’ll love to look up at each evening.


Walls & Showers: For a full RV Interior Design Upgrade!
Once your ceiling is updated and refreshed, turn the focus to the walls and shower with some of these brilliant lightweight RV wall panels.
These areas are perfect for trying out RV interior design ideas that balance practicality and style, and when done right, this will truly transform your camper van or RV into a home on wheels.
Accent Walls in RVs and Campers Vans
Continuing on with MirrorFlex (due to their lightweight materials, affordable and stylish panel options), add even more character to your space with some MirroFlex Wall Panels. Just like the ceiling tiles, they’re easy-to-install and can transform any motor home interior from plain to beautifully up-to-date in hours!
RV Shower Wall Panels
Including a shower in your RV or camper van is the ultimate for comfort and off-grid “bush” living, but typically it’s not an easy feat, but once again MirroFlex comes to the rescue.
Our shower wall panels & surrounds from MirroFlex are perfect for RV/camper van shower installations. They can be installed with ease when compared to traditional shower walls, they resist moisture, wipe clean, and give your shower a modern, stylish finish.


Pro Tip: Complete your RV Interior Remodelling one step at a time
When you start exploring camper home and RV interior remodeling ideas, don’t try to tackle the entire project in one go, as things usually take a lot more time than first thought, and you never want to cut corners when it comes to a moving-home.
Treat your renovation like your first big road trip, one stop at a time with plenty of time to do everything in a calm and collected manner.
- Start with the ceiling. A top-down update is the fastest way to make a big visual difference. Complete the ceiling before moving onto your RV’s wall panels.
- Update the walls. Feature walls can transform the look without major work, and when done after the ceiling is complete, you can seamlessly hide the transition between the panels (from your RV’s ceiling to the wall).
- Finally, refresh the bathroom. This is about as great as it can get for long-term comfort and resale value, so take the time to do it properly.
This phased approach works well for both RV interior renovation ideas and camper van interior design ideas, ensuring each upgrade is manageable and affordable.
Finishing Touches to Make it Feel like yours
The best RV interior ideas often come from simple finishing touches:
- Paint ceiling tiles to match your color scheme, if you haven’t purchased them pre-finished.
- Mix textures for a more custom RV interior design look, which can be achieved by installing matching style ceiling and wall panels with slightly different textures on the finish.
- Add patterns or metallic finishes for fun camper van interior ideas.

- Make the most of spare spaces: Add woven baskets and fun storage containers into all of the little nooks and crannies that add some extra style, flare and warmth to your camper van interior (and if you haven’t realised already, it won’t take long before you notice that storage is always scarce when living on the road!)
& lastly, always remember to choose lightweight RV panels!
Some Quick How-To Reminders
Before jumping into your RV interior renovation ideas, keep these basics in mind:
- Prep your Surfaces: Clean and dry any surface that you’re planning on renovating.
- Use the Right Adhesive: MirroFlex spray adhesive or a strong tile glue works best.
- Start from the Center: This ensures symmetry, especially for patterned tiles.
- Order Samples first: Colors and patterns can look different in person, as the second Golden Rule of RV renovations is: it’s better to be safe than sorry.

Wrapping Up
With products like styrofoam ceiling tiles and MirroFlex wall and shower panels, you can achieve a stylish, lightweight, and durable RV interior renovation, just don’t forget the golden rule: keep it light.
Whether you’re searching for RV interior decorating ideas, planning an RV interior remodel, or just collecting interior camper van ideas, the right materials make all the difference. Start small, plan in phases, and you’ll have a refreshed, functional space that makes every mile on the road feel like home.
If you want to discuss any products mentioned in this blog post or get some pointers, please feel free to contact our friendly customer service team today!
Camper Van & RV Interior Design FAQs
- Are styrofoam ceiling tiles safe to use in an RV?
Yes! They’re made from polystyrene, which is lightweight, non-toxic, and safe for interior use. Once installed with the correct adhesive, they stay firmly in place. even with some vibrations from the road.
- How do these panels hold up in heat and humidity?
Both styrofoam tiles and MirroFlex panels are designed to handle typical RV conditions. MirroFlex is especially moisture-resistant, making it perfect for bathrooms, kitchens and showers. Just avoid installing near direct flames or extreme heat sources.
- Can I install them myself, or do I need a pro?
These products are DIY-friendly and you can find lots of handy guides in our DIY Renovation Hub. Most RV owners can install them with basic tools and adhesive. If you can measure, cut with a utility knife and use glue, you’re good to go, but it won’t hurt to invite a handy friend or hire a qualified contractor for a bit of help.
- What if I want to change the look later?
Easy! Styrofoam tiles can be painted over, and most of the products mentioned in this post can be carefully removed and replaced if you decide to redecorate, although painting is the easiest option.
- Do I need to prep my RV before installing?
Yes, always prep, clean and dry surfaces, whether it’s for an RV interior renovation or at home. Remove old fabric, sand any rough patches and make sure your ceiling or wall is free of dust and grease before applying adhesive.
- Will these panels add weight to my RV?
Hardly! A full ceiling makeover with styrofoam tiles weighs less than a couple of gallons of milk. MirroFlex panels are lightweight too, designed for projects where weight is a concern. If weight is going to be a worry, we’d suggest starting your weight-reduction investigation by looking at some other elements in your RV or camper van first, as these panels are extremely light compared to plenty of other things that might already be in your motor home.
- What are the best RV interior design ideas for ceilings?
Lightweight styrofoam ceiling tiles or MirroFlex ceiling panels are perfect for low ceilings, adding style without extra weight.
- Can these products work for camper van interior design?
Yes. These products are lightweight and easy to install, making them ideal for camper van interior design ideas where space is tight - we don’t really see any differences between RV, Camper Van or Motor-home interior design when it comes to these products, in this case, they’re just different words for the same thing.
- What are simple RV interior makeover ideas on a budget?
Start with a ceiling update, then add one accent wall or backsplash. These changes are affordable but deliver a big visual impact, and if you’re handy, doing-it-yourself will make the budget go further.
- Are these panels durable enough for RV interior renovation ideas?
Absolutely. They’re designed to resist moisture, hold up to travel vibrations, and last for years.


