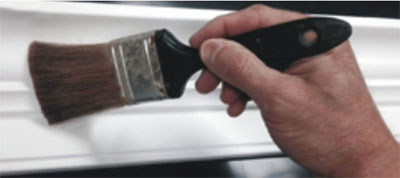
| Paint with water-based paints only. Brush one coat or spray two coats. |
 |
||||
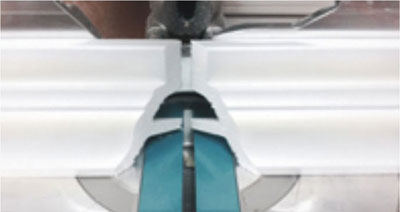 |
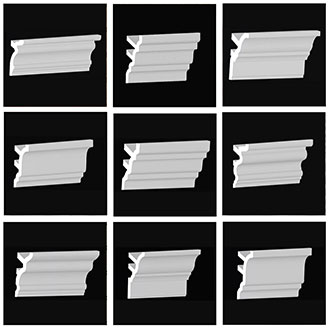
Cut 3-1/2", 4-1/2" and 5-1/2" crown moldings in most 1/2" miter saws in this position. | ||||
| Cut 3-1/2", crown moldings in most 10" and 12" miter saws in both saw positions. | 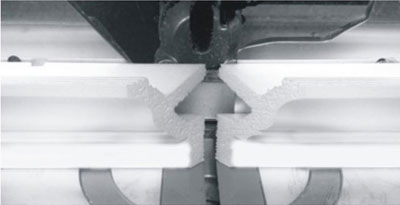 |
||||
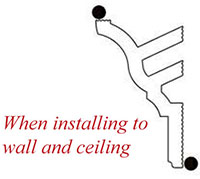
| Just apply a bead of Power Grab about the size of a pencil horizontally across locations for the different installation types. press it to the wall and wipe off any caulk on the seams. | |||||
 |
 |
||||
|
|||||
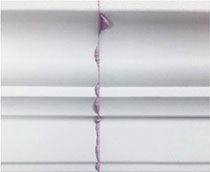
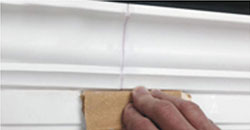
| Apply sandable spackle to the joint of the crown moldings that matches together. You can even apply the spackle to the ends of the moldings as they go together. Wipe or smooth off the joint with a caulking tool or a plastic card. Next, let the spackle dry well and then sand off the spackle with a 150-200 grit sandpaper. Now you can touch up the joint with paint for a finished look. | |||||
| TIP: Never use Power Grab in vertical joints between corners. Always use spackle. Use Power Grab for installing the crown molding along the vertical seams. Use Power Grab for your inside and outside corners. Apply caulk on the cut ends of the molding before aligning them up for a better bond. | |||||

Crown Molding Corner Block Installation Instructions
| 1 Measure the projection of your crown molding. Then choose the block with the measurement just over the crown molding projection. |
 |
||
| 2 For vaulted ceilings measure the angle of the ceiling with an angle finder. Next mark it on the block and cut it with a saw. |
 |
For flat ceilings measure to the top of the crown molding and saw. | 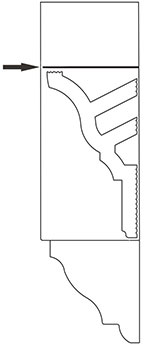 |
3 |
Apply a good bead of power grab in the grooves on both sides of the block. | ||
| 4 Next, align the block up into the corner position and press inn firmly. Wipe off any excess caulk off with a caulking tool or finger. |
 |
||
Available Sample Packs
Ceiling Tiles
- What are Ceiling Panels Called
- Ceiling Tiles Replacement
- Ceiling Tiles with Pictures
- Ceiling Tiles as Headboard
- When Was Ceiling Tiles Made
- Is Ceiling Tile a Good Idea
- Can You Put Ceiling Tiles Over Drywall
- What Ceiling Tiles Have Asbestos
- Ceiling Tiles for Bathroom
- Metal Ceiling Sheets
- Are Ceiling Tiles Asbestos
- What is The Purpose of Ceiling Tiles
- Can Ceiling Tiles Be Used on Walls
- Ceiling Tiles as Insulation
- Can You Put Tiles on the Ceiling
Wall Panels
- Acrylic Wall Panels
- Stacked Stone Panel
- Beadboard Paneling
- Decorative Wall Paneling 4x8
- Metal Wainscoting
- Shower Panel Walls
- 4x8 Wall Panel
- Bathroom Wall Paneling 4x8
- Metal Backsplash for Kitchen
- Vinyl Panel Wall
- Shower with Subway Tile
- Art Deco Tile
- FRP Adhesives
- Wood Panel Wall Decor
- Wainscot Panels
- Wood Wall Paneling Sheets
Moldings
- Crown Molding for Kitchen Cabinets
- Crown Molding on Ceiling
- Moulding for Corners
- Paneling Molding
- Corner Blocks for Crown Molding
- Metal Molding
- Crown Molding with LED Lights
- Vaulted Ceiling Crown Molding
- Wall Panel Moulding
- Crown Molding Corners
- Moldings Ceiling
- Dentil Moldings
- Modern Crown Molding
- 6 Inch Base Board
- Polyurethane Crown Molding
Popular Pages
- Ceiling Panel
- Faux Mantels
- Backsplash Tile Samples
- Faux Beam Vaulted Ceiling
- Stainless Steel Tile Backsplash
- 24 Inch Ceiling Medallion
- Ceiling Medallions
- How Much Do Wood Ceiling Beams Cost
- Ceiling Tile Grid
- PL Premium
- Cornice
- Vaulted Ceiling Truss
- Corbels Wooden
- Ceiling Medallion Square
- What are Faux Wood Beams Made Of
- J Tracks