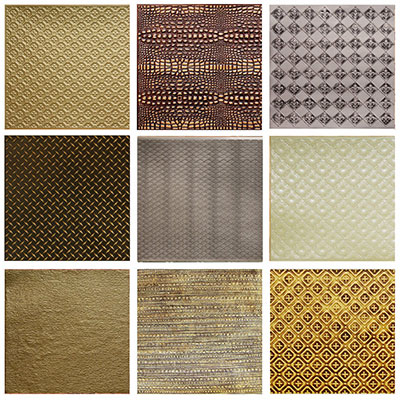
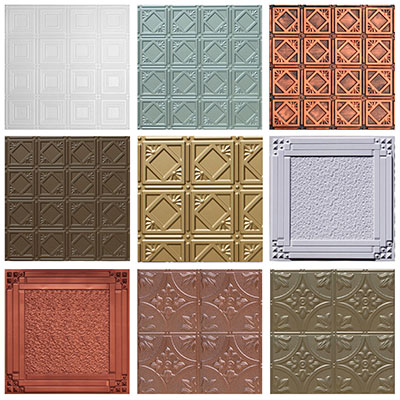
If you're thinking of adding more character and charm to your existing ceiling, you may be wondering how do you make drop ceiling tiles look better?"
Chances are you have been playing around with the idea for some time, but have not managed to roll up your sleeves and get to work. Maybe you have not found a cheap alternative or maybe you just don't know where to start! In this video, you will see the BEFORE and AFTER effects of using affordable PVC Ceiling Tiles over existing Armstrong Ceiling Tiles.
In order to successfully complete this process, you will need the following materials:
- Contact Concrete
- PVC Ceiling Tiles
- Paint Brush or Roller
- Measuring Tape
- Sharp Blade
- Spray Paint (choose a color that blends with the tiles)
- Pencil
- Large plastic sheets to cover furniture
- Screw Drivers
Preliminary steps
- Contact Cement has a lot of fumes, so it is important that you work in an area that is fully aerated. You can mount a working area outside of the building you plan to install the PVC ceiling tiles. You should set up an area for the existing tiles and another for the PVC ceiling tiles.
- Use the spray paint to paint the grits. The color you choose should match the color of the PVC ceiling tiles you intend to install. In the video a copper paint was used to match the copper PVC ceiling tiles.
- Get all the materials and tools you plan to use in one place.
- Cover furniture or any other relevant item with the large plastic sheets
- Arrange everything in the room to facilitate moving around.
- Remove all fixtures with the appropriate screwdrivers
- Locate the midpoint of the Armstrong tiles by using the measuring tape to measure the length and width of each side. The midpoint is the length and width divided by two.
How do you make drop ceiling tiles look better? By following this step-by-step guide!
Step 1: Once you are finished spray painting the grit, then it is time to remove the Armstrong ceiling tiles. It is best to remove them one by one instead of all at once. This initial step can guarantee a smooth application; future visitors will be convinced that you know how to decorate a ceiling like a professional.
Step 2: Place the Armstrong ceiling tile that you removed on the area you prepared outside and paint it with Contact Cement. You may use a roller to apply the Contact Cement if you prefer. This alternative is faster since you will be covering a larger surface area with the roller.
Step 3: Apply Contact Cement to the PVC ceiling tiles. You should apply the product on the flat surface and not on the raised embossed area. Take care to apply to the edges as well. When this is done, then wait approximately 15 minutes to dry.
Step 4: When the 15 minutes have elapsed, then you can put the PVC ceiling tiles on the Armstrong ceiling tiles. Press firmly against the PVC ceiling tile to ensure that all the areas you applied the contact concrete are touching the Armstrong ceiling tile for proper installation.
Step 5: Once you have a tight fit, then use a sharp blade to cut away the excess of the PVC ceiling tiles.
Step 6: Install the tiles in the area you originally removed the Armstrong ceiling tiles.
Step 7: Repeat steps 2 to 6 until you have installed replaced the Armstrong ceiling tiles with PVC ceiling tiles. The amount of time you take will depend on the area of your ceiling.
Step 8: Reinstall fixtures after the tiles are all in place.
Extra Tips
Tip 1: The amount of PVC ceiling tiles that you decide to install will depend on the area you intend to cover. You can either look at existing blue prints to determine the area of the ceiling or you can measure it yourself. When you have the total area, then divide this by the area of one PVC ceiling tile to determine how many tiles you will need.
Tip 2: PVC ceiling tiles are perfect for any setting, so whether you have a business or want to have a new touch to your home, both are excellent areas. The versatility of the material makes physically manifesting ideas for ceiling tiles simple.
Find the Perfect Tiles for your Redesign
Click on the option that best describes what you want and start shopping for the perfect design.
- I have a drop ceiling 2ft x 2ft (square) and I want to re-skin it with your faux tin tiles.
- I have a drop ceiling 2ft x 4ft (rectangular) and would love to cover it up with your beautiful tiles.
- I have a drop ceiling and would love to replace it completely.
- I have questions and want to talk to one of your experts to help me create a stunning ceiling. ( Call 1-866-297-0380 ext. 610)
Ceiling Tiles
- Faux Wood Beams
- Black Drop Ceiling Basement
- Beadboard Ceilings
- Drop Ceiling Panels
- Ceiling Tile 2x4
- Ceiling Tiles for Basement
- What Do You Call The Tiles in The Ceiling
- Modern Ceiling Tiles
- Decorative Metal Sheets
- 12x12 Ceiling Tile
- 24x24 Ceiling Tile
- Foam Ceiling Tiles
- Embossed Ceiling Tiles
- Ceiling Beam
Wall Panels
- Wall Panels 4x8
- Vinyl Beadboard
- Faux Stone Tile
- Wainscoting Tile
- Textured Wall Panel
- Wood Paneling Walls Decorating
- Wood Paneling Sheets
- 3D Wall Paneling
- Metal Wall Panels
- Tub Wall Panels
- Corrugated Metal Paneling
- Fluted Wall Panel
- Herringbone Tile in Bathroom
- Copper Tiles Backsplash
- Clear Wall
- Corrugated Wall Panels
Moldings
- Modern Flat Crown Molding
- Molding Casing
- Metal Molding
- Crown Molding with LED Lights
- Vaulted Ceiling with Crown Molding
- Decorative Molding
- Polystyrene Crown Molding
- Outside Corner Trim for Tile
- Crown Molding for Cabinet Tops
- Best Crown Molding for Low Ceilings
- Crown Molding Kitchen
- Moulding Corner
- Crown Molding Inside Corner
- Wall Panel Molding
Popular Pages
- Ceiling Medallions for Chandeliers
- Decorative Ceiling Panels
- Backsplash Tile Samples
- J Tracks
- What are Faux Wood Beams Made Of
- Pediments
- Faux Wood Beams Living Room
- Ekena
- Ceiling Medallion 24
- Ceiling Medallion Rectangle
- Ceiling Medallion Square
- Faux Wood Fireplace Mantel
- Black Ceiling Grid
- Corbels Wooden


