At DecorativeCeilingTiles.net, we’re more than just a supplier, we’re your partner in reimagining your home or commercial space. Our premium-Quality Ceiling Tiles and Wall Panels have transformed countless homes, offices, retail stores and hospitality venues across the country.
Among our most popular innovations are the Seamless 3D Wall Panels: lightweight, eye-catching and easy to install with a glue-up/surface mount method. These panels make it simple to add texture and depth to any wall without visible seams.
In this guide, you’ll learn how to create a flawless feature wall with step-by-step instructions, tips from the pros and everything you need for success.
For a complete visual walkthrough, we also recommend watching our installation video.
Before We Get into the “How To’s”, Let’s Address Why Seamless Wall Panels are Such a Great Design Option
3D Seamless Wall Panels don’t just make for a showstopping room feature, but they’re innovative seamless design makes them appear as though they’re on large decorative panel.
Seamless Finish
Designed to interlock cleanly without visible joints
Visual Impact
Adds depth and sophistication to any space
Easy Installation
DIY-friendly with just a few basic tools
Customizable
Paint them to match your style
Durable and Lightweight
Made from polystyrene foam for durability
Equipment Needed for Your Diy Seamless Panel Installation
For a smooth installation of your seamless wall panels, make sure you have the following equipment on hand and ready to use:
- Heavy-Duty Cutter
- Measuring Tape
- Spirit Level
- Pencil
- Primer
- Adhesive for Polystyrene Foam (Instant Grab #310)
- Acrylic Filler (optional)
- Acrylic or Latex Paint (optional)
Seamless Wall Panel Step-By-Step Installation Guide
1. Acclimate the Panels
Let your panels sit in the room for at least 4 hours before installation to adjust to ambient temperature. This prevents warping and ensures proper adhesion.
Note: Make sure to inspect them for damage that may have been caused during transport before installation as once you install the panels on a wall or ceiling, you will not be entitled to make any warranty claims.
2. Prepare the Wall
Start with a clean, dry and smooth surface. Patch any holes or imperfections with a filler. If the surface is glossy, lightly sand it with fine-grit sandpaper to create a better grip for the adhesive.
Note: Apply a primer to the wall before installing the panels. This step improves adhesion and long-term durability.
3. Plan your Layout
Lay out your panels on the floor or sketch a plan to determine your layout. Pay attention to:
- - Pattern direction
- - Panel alignment and cuts
Use a level and pencil to mark guidelines directly on the wall.
4. Cut the Panels
Measure and mark your panels as needed. Use a heavy-duty cutter to make clean and straight cuts. This step is crucial for tight, seamless joints.
5. Apply Adhesive
Apply the adhesive in a zigzag or dotted pattern, keeping about 1 inch from the edge. Also apply a small line of adhesive along the edges that will contact adjacent panels for a tight seam. Be careful not to over-apply. Excess adhesive can ooze out during installation.
6. Install the Seamless Panels
Gently press each panel against the wall, aligning it with your pencil marks. Hold it in place briefly to ensure proper bonding. Avoid pressing too hard, this could dent the foam. Use a damp cloth to wipe away any extra adhesive before it dries.
7. Seal the Seams (Optional)
If there are minor gaps between panels, apply a thin bead of acrylic filler. Let everything dry for at least 24 hours before painting.
8. Paint the Panels (Optional)
Use acrylic or latex paint designed for interior use. Apply two coats for best coverage. We recommend testing on a spare panel first.
Avoid spray paints or oil-based products that may damage the foam.
If you need any help during the process, please don’t hesitate to contact our friendly team of experts.
Tips From the Pros
- - Let panels acclimate to the room temperature for 4 hours before installing
- - Prime the wall before installation for best results
- - Use adhesives made for polystyrene foam (such as our Instant Grab Water Based Adhesive)
- - Use a sharp knife for clean panel edges and precise cuts
- - Avoid pressure: don’t press panels too hard onto the wall
- - Seal joints with acrylic filler if you spot small gaps
- - Wait 24 hours before painting the panels
Recap: Create a Seamless 3D Feature Wall in 8 Easy Steps
- Acclimate the panels for 4+ hours
- Prepare and prime the wall surface
- Plan the layout using a level and pencil
- Cut panels to fit your wall dimensions
- Apply the adhesive in a dotted pattern
- Install the panels gently and accurately
- Fill joints with acrylic filler (optional)
- Paint after 24 hours with latex or acrylic paint (optional)
Featured Seamless Panels Showcase
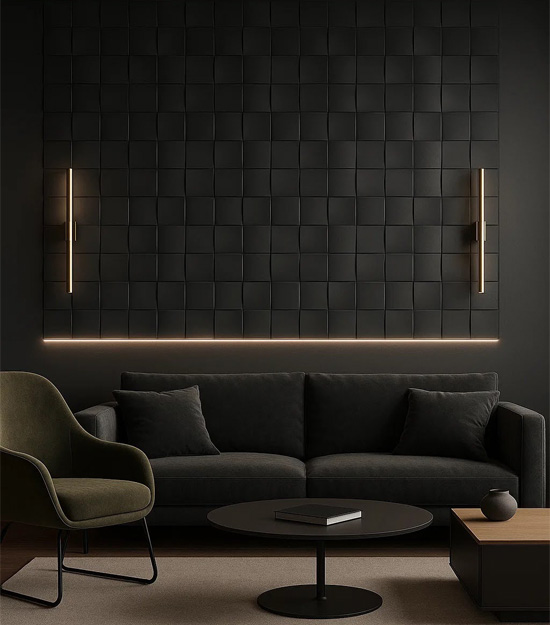
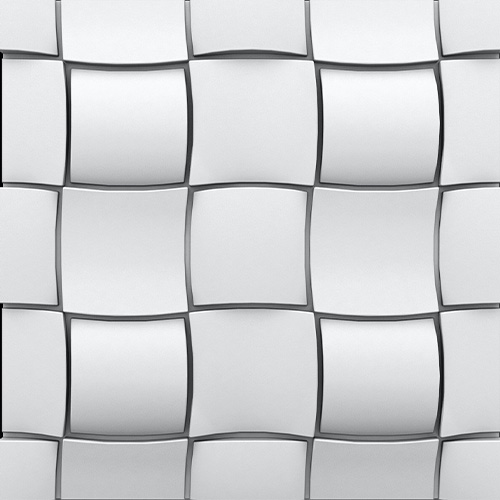
Rubik 2ft. x 2ft. Seamless Glue-up 3D Wall Panels
Rubik: Architectural Geometry
Bold, Structured Geometry for Modern Interiors
Styling Tips: Brass Lighting, Velvet Furniture and Linear Design

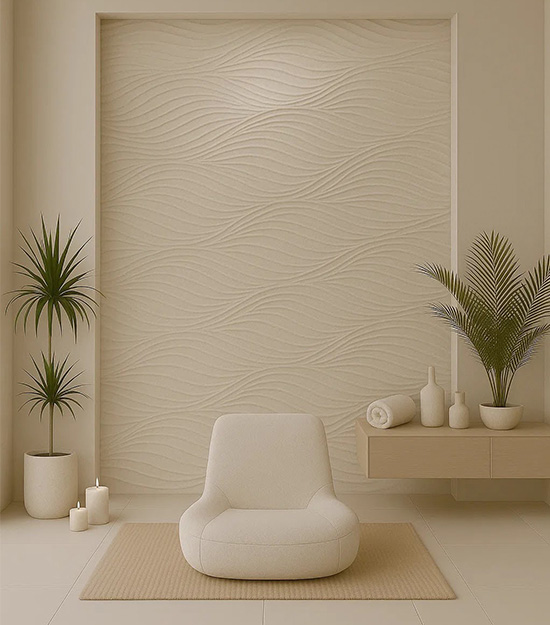
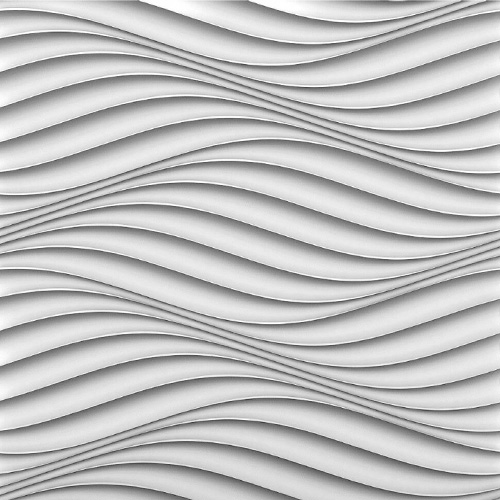
Wind 2ft. x 2ft. Seamless Glue-up 3D Wall Panels
Wind: Flowing serenity
Organic Wave Textures for Calming Environments
Styling Tips: Earth Tones, Uplighting and Bamboo Textiles

Note: images created by AI, they are not real.

