Creative Crown
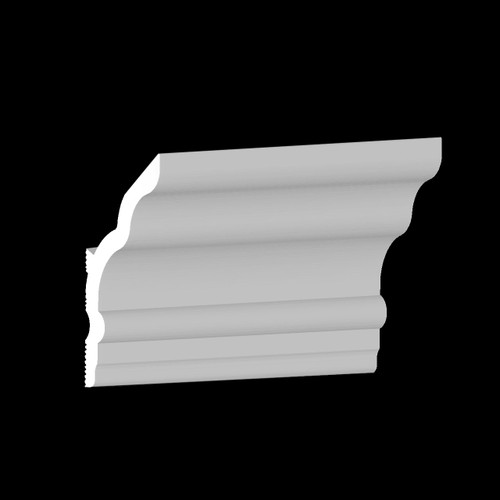
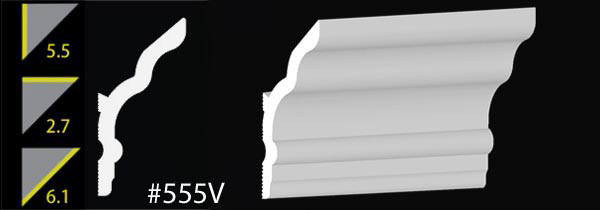
DIY Foam Crown Molding for Vaulted Ceilings: 6 Inches by 8 Feet
Images are not true representations of the actual color of the product, some are computer generated. Be sure to order samples to make sure the colors will work for you.
How Many Pieces Do I Need?
Project Estimator for
Do you like the look of this product but need help with installation? Learn more in our 'How To' section or get assistance from a professional installer.
- Model No.
- CC555V
- Condition:
- New
- Availability:
- InStock
- Material:
- Styrofoam
- Color:
- Plain White
- Length:
- 95.5"
- Paintable:
- Yes (with water-based paint)
- Installation Method:
- Glue-up (use Instant Grab #310)
- Type:
- Vaulted ceiling crown molding
- Recommended Accessories:
- Pre-cut vaulted corner moldings, touch-u
- Custom Finishing:
- We can paint the moldings with any water-based paint of your choice. Please contact us for a custom quote.
- Return Policy:
- 30 Days Return Policy
About Our Vaulted Ceiling Crown Molding
If you have a vaulted ceiling, crown molding can be a challenge to install, but it doesn't have to be. These DIY foam crown moldings are specifically made for angled, cathedral, sloped and vaulted ceilings. Rather than having a typical flat back and top, our crown molding for a vaulted ceiling is designed to nest comfortably into the corner where the wall meets the ceiling, no matter what angle that corner might make. To add this crown molding to a cathedral ceiling, all you need to do is measure and cut the pieces as needed and then glue them into place. It's never been easier to install crown molding on vaulted ceilings!
Specifications
|
|
Cutting and Painting Process
How to Mount Crown Molding on a Vaulted Ceiling
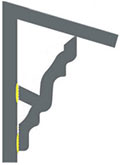
Installs on flat 45 degree downward ceilings |
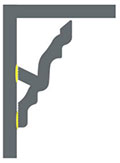
Installs on flat 90 degree ceilings |
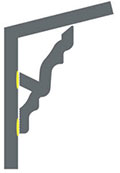
Installs on angled, sloped / ceilings up to 135 degrees |

Just slide it up the wall until the top of the molding comes in contact |
Use these corners on vaulted, angled and cathedral ceilings with the foam crown molding going up or down from 90-135 degrees.
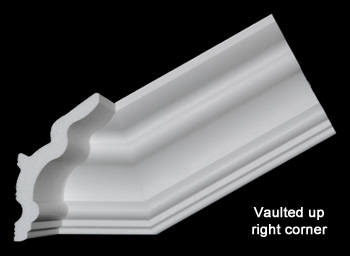 |
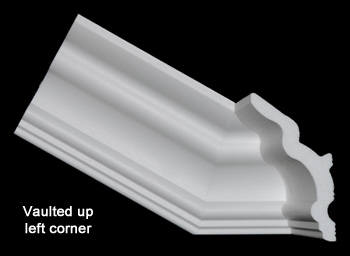 |
 |
 |
Installation on 45-degree downward ceiling
Installation on flat 90-degree ceiling
Installation on sloped ceilings up to 135 degrees
Just slide it up the wall until the top of the molding comes in contact with the ceiling.
About Our Vaulted Ceiling Crown Molding
If you have a vaulted ceiling, crown molding can be a challenge to install, but it doesn't have to be. These DIY foam crown moldings are specifically made for angled, cathedral, sloped and vaulted ceilings. Rather than having a typical flat back and top, our crown molding for a vaulted ceiling is designed to nest comfortably into the corner where the wall meets the ceiling, no matter what angle that corner might make. To add this crown molding to a cathedral ceiling, all you need to do is measure and cut the pieces as needed and then glue them into place. It's never been easier to install crown molding on vaulted ceilings!
Specifications
|
|
Cutting and Painting Process
How to Mount Crown Molding on a Vaulted Ceiling

Installs on flat 45 degree downward ceilings |

Installs on flat 90 degree ceilings |

Installs on angled, sloped / ceilings up to 135 degrees |

Just slide it up the wall until the top of the molding comes in contact |
Use these corners on vaulted, angled and cathedral ceilings with the foam crown molding going up or down from 90-135 degrees.
 |
 |
 |
 |
Installation on 45-degree downward ceiling
Installation on flat 90-degree ceiling
Installation on sloped ceilings up to 135 degrees
Just slide it up the wall until the top of the molding comes in contact with the ceiling.
