How to Install and Personalize Faux Brick Facade Panels Step by Step Guide
Written by Milan Jara on 4th Apr 2022

Faux brick facade panels are wonderful for people looking to add a decorative and affordable touch to their homes. Learn about installation with this step-by-step guide.
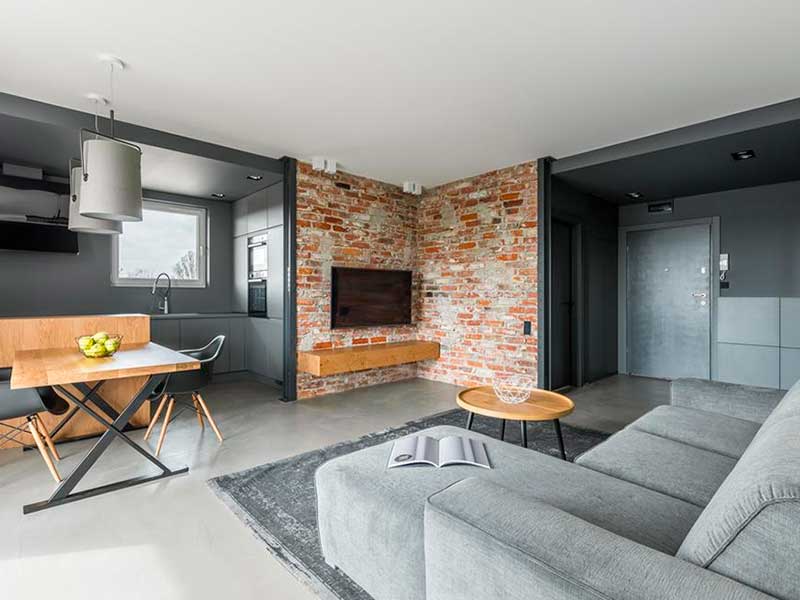
The exquisite look of good brick masonry work can spruce up any interior design. The problem with using brick on your interior walls or any other accent feature is that it's crazy expensive, super messy, heavy, and hard to work with. On the other hand, faux brick facades are easier to install, less expensive, and look like real brick. They have all the characteristics of real brick in terms of texture, shape, and color. What’s different is that faux brick façade panels are very light, and you can install them directly to drywall, concrete, brick, or any other surface using only a few nails and some adhesive.
For many people, faux brick facades are the best choice because you can personalize them in a wide range of styles that don't require a very high budget. There are several ways to both personalize and apply faux brick panels. This article shows you how to install faux brick using an adhesive with nails and screws, including plenty of tips to help with other sorts of installs and customizations as well.
Before diving in headfirst, there are a few things that we must explain to ensure that the installation goes as smoothly as possible.
Storage
- In the rare event that your brick facade panels bow or flex due to improper storage or temperature fluctuations, lay them flat on the ground, and they will usually correct themselves.
- To avoid this problem, always store brick veneer panels indoors and on flat, even ground.
- If your brick panels are in a cool climate or room temperature, you can install them immediately.
- If the panels come from a hot or humid environment, you need to ensure your brick wall panels have not warped.
- It doesn't matter if they're heavy-duty precast concrete or lightweight individual faux brick panels, most materials expand and contract when exposed to extreme temperatures and uneven temperature changes. Therefore, you should allow your faux brick wall paneling and adhesive to acclimate to the space where you're going to install it for at least one day.
Materials Needed
- Faux brick paneling
- Table, miter or circular saw
- Measuring tape
- Construction adhesives
- Nail gun and screws (optional)
- Level
- Protective gloves and glasses
- Sandpaper or sanding block 100 grit
Material Related Notes
- Cut faux wall panels using a miter saw, circular saw, or table saw. For smooth cuts when using a circular saw, make sure the blade has 80 teeth or more.
- Accessories such as inside and outside corners, ledge trims, outlet covers, and more might be needed for certain installations.
- We recommend TapCon screws if you’re installing onto concrete, brick masonry, tile, or stone. Always wear protective gloves and safety glasses when using a saw.
- Some sawed edges may require sanding. Use 100 grit sandpaper or sanding block to smooth and tidy up sawed edges.
Important Before Installation Notes
- Before doing anything, measure your walls so you know exactly how many panels you need to buy.
- Typically, faux brick wall panels cost between $11 and $14 per square foot. Most sites selling these panels have a handy calculator that will help you determine how many you will need.
- Most faux brick veneer panels are for indoor use only. Although certain types are OK to use outdoors, check beforehand.
- Always use the flat backside of these decorative panels for all measurement marks and cuts.
- To ensure a good-looking finished result, it's important to install on a clean, flat, and dry surface.
- It’s not recommended to use these faux wall panels on exterior walls.
- It’s important to take your time when installing the first row of panels. These need to be as straight and level as humanly possible. When the first roll of panels is level and straight, the entire wall likely will be as well. However, If the first row is slightly off, it will make everything slightly off.
- If you’re installing on a wall starting from the floor, make sure the floor is level.
- If there are uneven spots on the floor, carefully trim the bottoms of the first row of facade panels so they sit evenly on the floor.
- Measure everything exactly (no rounding up or down) and cut your panels to size if necessary. Modify the veneer as needed to fit around corners or edges. Measure and mark first then cut them to size Use the screws and nails along the tongue or in other inconspicuous locations.
- We recommend staggering because the seams will offset and disappear when panels are staggered by 1/3 of their length.
Installation
The first step is determining whether you want to hang heavy shelving or artwork on your new brick wall. If the answer is yes, you need to mark the wall studs before installing the panels. Marking the stud locations on the wall doesn’t do much good since you are going to completely cover the wall. Instead, mark the location of the studs on the ceiling. Once you find a stud, hold the level vertically against the wall where the stud is and butt the end of the level against the ceiling. Then mark the spot with a small pencil for future reference.
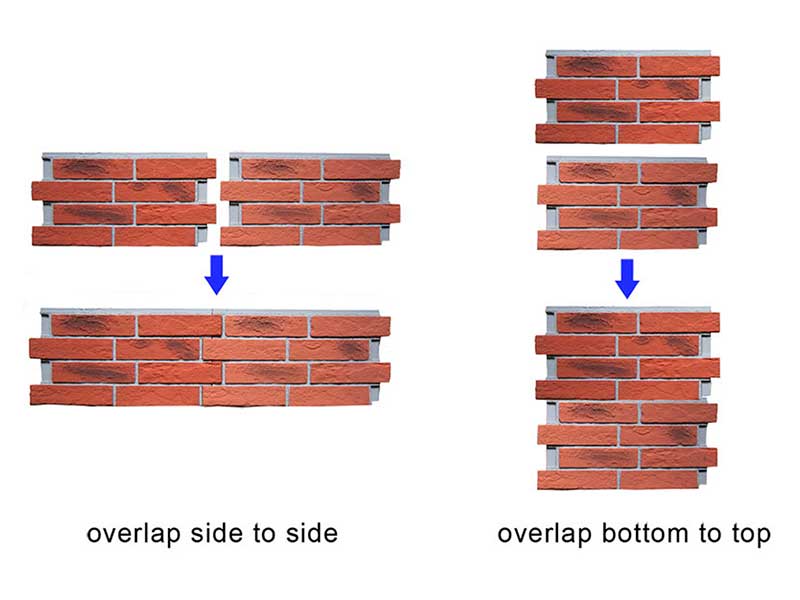
The next step is measuring where you’re going to install the paneling and figuring out how to best install the panels with as few cuts and seams as possible. It's important to keep in mind that the goal of this installation is to create the entire wall with no noticeable seams. Thankfully the design of these veneer panels makes this pretty easy to do. To create a seamless appearance with faux brick wall panels, you first need to join each tile together end-to-end and in a horizontal row. Starting from the bottom corner of the work area.
Note that, depending on the size of your panels and how capable you are, you may want to enlist some help installing your faux brick panels. The panels can be heavy, and they also tend to want to slide down the wall at first due to the wet adhesive. Having an extra set of hands is very helpful as one person can hold the panels against the wall while the other person nails them to the wall.
Once you’ve got everything measured and cut, spread a thick layer of adhesive on the back of the veneer, then press the panel evenly against the surface to spread the adhesive, then nail or screw in as needed. You can also apply construction adhesive to the surface material as well before nailing the panels in.

After putting glue on the second panel, place it next to the first as close together as you can. Repeat until you've completed the first row, then check to ensure it is level before proceeding.
The next step is to apply adhesive to and place the first panel of the second row right above the first panel on the first row. Match the top lip of the bottom paneling with the bottom edge of the top panel and slip the protruding lip right in behind the bottom edge of the panel above it. Repeat until done. Simply wipe off the excess adhesive on the wall with a warm, damp cloth when finished or as needed. Remember to wipe off your tools as needed. To remove the adhesive from the skin, use soap and warm water.
Touch Up and Personalization Instructions
- To conceal any holes or visible screws in the brick veneer, simply apply some caulk, spackle, or wood filler to the hole. After it's dry, apply some glaze, touch up paint, or stain.
- For a good color match, give the paint containers a good shake before each use and apply only to the areas where it’s needed.
- Apply touch-up paint or stain using a brush. Let it sit for 20 seconds, then use a rag to wipe lightly until you achieve the desired color, then allow the paint to dry.
- When using water-based paint, dry time can differ due to the room's airflow and temperature.
- Use a clean and dry brush to avoid contamination if you switch colors.
- To fill gaps where the faux brick wall panels meet the ceiling or the corners of the wall, use joint compound on a small trowel as a sealant. Just fill the gaps with the joint compound and then run your finger over it to get a nice finished look.
Conclusion
Hopefully, this installation guide has shown that faux brick facades are one of the best ways to renovate your home with minimal effort.