Drop ceiling Installation Instructions
While drywall is the finish material most often found on the ceilings of homes, drop-in ceilings are usually the first choice of commercial contractors for professional offices, restaurants, and retail spaces. The drop-in system has also been a favorite of remodeling professionals for residential basements that don’t have a ceiling already in place.
What are the advantages of drop ceiling tiles installation that makes this choice popular with construction professionals? Unlike most other ceiling finishes, suspended-ceiling tile installation allows easy access to the area above the tiles so that small adjustments can be made without damaging the ceiling. Anyone with a few minutes to watch an online video or follow simple instructions can quickly learn how to install drop-ceiling tiles. Homeowners and repair professionals can simply lift out a few tiles, make the necessary repairs or changes, and drop the tiles back into the grid when finished.
A drop-in system also allows variable ceiling height so wiring, plumbing, and mechanical lines can run below the ceiling joists rather than through them. This system can eliminate or greatly reduce the amount of cutting and drilling necessary for installation or repair.
Finally, a drop-in ceiling can be used to complement a space’s interior décor – something that often isn’t possible when using standard drywall without going to the time, trouble, and expense of custom paint or a textured finish.
Additionally, a drop-in ceiling system might be the best choice for your home renovation project if you live in an older house where the framing has settled over time. In this case, a drop-in system enables the installation of a level ceiling without a lot of costly framing corrections. It also allows you to cover the existing ceiling surface without expensive demolition and doesn’t require new plywood to be installed on the joists as is needed for many nail-up tile applications. Shop around and compare prices and ceiling options. You will quickly see that there are many advantages to a drop-in ceiling. Once you are ready to buy your tiles, and especially if you plan on doing the remodeling work yourself, your biggest question might be whether a decorative drop-in ceiling tile installation is a DIY-friendly home project. The answer is a resounding, “Yes!” To learn how to install drop-ceiling tiles begin by watching the videos on this page. These videos along with these simple instructions should help you successfully complete your dropped-ceiling installation.
Tools and Materials Needed for the Project
These are the tools and materials that you’ll need for your drop-in decorative ceiling tile installation:
- Hammer – just a standard household hammer
- Tin snips –used for cutting tiles, grid, and wire hangers
- Screw gun – if you use screws instead of nails
- 4- or 6-foot level – used for leveling the ceiling and as a straight-edge for cutting
- Measuring tape – a tape with a wide blade and lock works great for marking T locations
- Miter box and hacksaw – used for cutting wall-angle corners
- Step ladder – handy for reaching the ceiling if you happen to be under 7 feet tall
- String line and chalk – used for several purposes during the installation
- Wall angles – found at just about any home improvement store and used to support tiles at the room’s perimeter walls
- Main and cross Ts – also found at home improvement stores and used to support the center of the drop-in ceiling system
- Hanger wires – sold with the tees
- Nails or screws – used for attaching wall angles to the walls and hangar wires to the ceiling joists. Lengths can vary depending on your wall covering, but they should be long enough to provide a good anchor into solid framing
- Laser level – this is optional, but can make the job go much quicker. They are available at most tool rental establishments or can be purchased at home improvement stores.
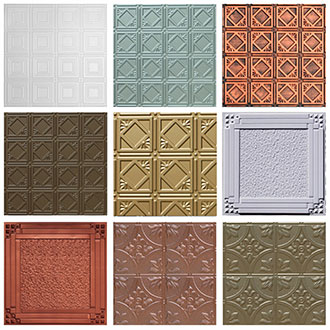
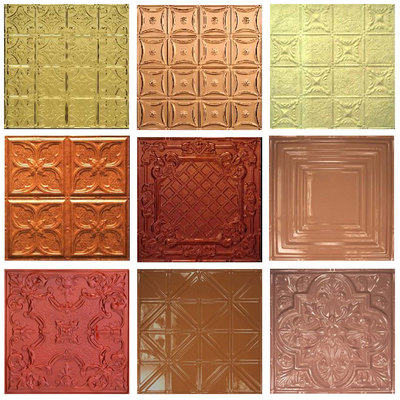
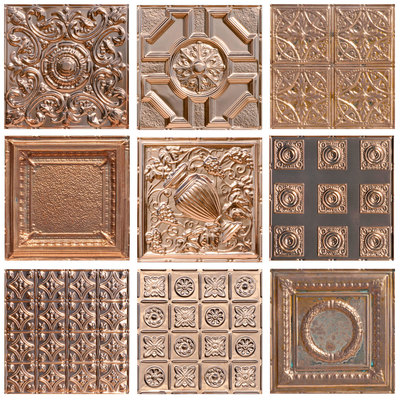
- Drop-in decorative ceiling tiles – available from Decorative Ceiling Tiles in numerous styles and finishes. Make sure you order tiles designed for drop-in applications.
- Drop-in grid sleeves and cuffs – also available from Decorative Ceiling Tiles in finishes to match your tiles
Room and Ceiling Preparation
While you may be anxious to start installing grid and tiles, there’s a little prep work which must be done first:
- Clear the room – While this isn’t an absolute necessity, it can make the job go faster and reduce the chance of accidents caused by tripping over end tables or couches. At the very least, move everything to one side of the room while working on the other side.
- Cover the floor – While a drop-in installation normally isn’t usually messy, you still don’t want to take the chance of scratching your hardwood floor or tearing carpet.
- Remove loose ceiling debris– If you have a popcorn or textured ceiling, scrape away any loose debris.
- Find the room center – If you have a light fixture or ceiling fan in the room that looks as if it is in the middle, use this as your center. Otherwise, pull your string line diagonally across the room from corner to corner, and the location at which the two lines cross should be the center. Make sure you take into account any offsets the room may have. Place a nail or make a mark at the center, as this will be your starting point.
- Lay out your ceiling design on paper – Use a piece of graph paper to draw the ceiling layout with each graph square representing one or two square feet, depending on the size of the room and your paper. This is called drawing to scale and is used to give an indication of your tile layout. Your first main T will run perpendicular to the ceiling joists and through the center you just marked. The remaining main Ts will be at two-foot intervals until reaching the perimeter walls. The first cross Ts will intersect the room center and be perpendicular to the main Ts. The remaining cross Ts will be at two-foot intervals until reaching the other two perimeter walls. If your drawing indicates that you will have a section of tiles smaller than 6 inches at any perimeter wall, the ceiling may be more attractive if you shift the entire system several inches prior to installing any tees.
- Mark the ceiling joists – If the ceiling joists are exposed, you can skip this step; otherwise, use your string line and chalk to mark the location of the joists. This is helpful when you’re installing the wire hangers that support the Ts.
- Mark your new ceiling height – The drop-in ceiling should be at least 3 to 4 inches below the existing ceiling surface or the exposed joist bottoms, but 6 inches is ideal. However, keep in mind the height of the top of your door and window trim and keep the new ceiling above them if at all possible. Make a mark on one wall at the height at which the new ceiling will be installed.
- Mark the perimeter walls – Use the laser or 6-foot level to draw a line around the perimeter walls to designate the height of the new ceiling. This ensures that your new ceiling will be level, even if the existing ceiling is uneven.
Installing the Grid System
You now have your prep work done and are ready to begin installing the grid system that will support the decorative ceiling tiles. If you did the prep work correctly, these steps should be quick and easy:
- Install the wall angles – Fasten your wall angles to the perimeter walls along the line you marked. The angles should be nailed or screwed into the wall framing studs securely. The wall angles can overlap at inside corners, but should be mitered neatly for outside corners.
- Install the main T hangers – Using your diagram as a guide, run a string line across the room from wall angle to wall angle at the location of the first main T. Keep in mind that this should be perpendicular to the ceiling joists. Attach the hanger wires to the bottom of the joists with nails or screws at 4-foot intervals. The wires should extend about 12 inches past your string line, which is at the new drop-in ceiling height. Bend each wire at a 90 degree angle where it crosses the line.
- Install the main Ts – The main Ts will extend from one side of the room to the other and will be secured to the wall angles. Depending on the width of the room, you may have to splice one or two main Ts together to reach across. Thread the wire hangers you installed through the holes in the main Ts to support them as they cross the room. Check to ensure the bottom of the T is even with the string line. Twist the end of each wire after it passes through the T back around the hanging wire to hold everything securely in place. Install all main Ts in this fashion.
- Install cross tees – The cross Ts are installed from one main T to another at 2-foot intervals to support the remaining 2 sides of your drop-in decorative ceiling tiles. There should be slots in the main Ts where the tab on the cross Ts lock. If there isn’t already a hanger wire at the main T where installing a cross T, install one so that all joints are securely supported. When the ceiling is finished, you should have a series of 2-foot grid squares except possibly at the perimeter of the room.
Special note – Some grid support systems use a main T every 4 feet rather than every 2 feet. These systems will have a 4-foot secondary T that spans the distance between the main tees. The cross Ts are then used to divide the gaps between the main and secondary Ts into 2-foot squares for your tiles. If you have this type of system, follow the above directions for installing the main Ts, and then snap the secondary and cross Ts into place. There should be a hanger wire everywhere a secondary T connects to a main T.
Install the Grid Sleeves and Decorative Ceiling Tiles
Once the grid system is in place, you’ll finally get a chance to see how your decorative ceiling tiles transform the room by following these last steps:
- Install grid sleeves – If you purchased grid sleeves from Decorative Ceiling Tiles, now is the time to install them on your Ts and wall angles. There are also cuffs available for your 3- and 4-way intersections.
- Drop the tiles into place – You can drop the tiles in place by angling them all the way up through the grid openings and then allowing them to drop gently down onto the supports. Make sure you take any directional patterns into account when you install your tiles.
- Install the perimeter tiles – Measure for your perimeter tiles and then subtract about ¼ inch so the fit isn’t too tight. Use your level as a straight-edge to draw the cutting line and use tin snips to make the cut. Keep in mind when measuring that the tile has to extend over the adjacent T and wall angle for support.
- Caulk if needed – In most cases the tiles will sit down tight on the Ts and wall angles, but if they don’t, you can close any gaps by applying a clear or colored caulk. Make sure you wipe off any excess before it has a chance to dry.
Congratulations – you have now installed a drop-in decorative tile ceiling!
Available Sample Packs
Ceiling Tiles
- Wood Beams
- Copper Ceilings
- How Much Do Ceiling Tiles Cost
- Corrugated Metal Ceiling Tiles
- Styrofoam Wood Planks
- Wooden Ceiling Planks
- Commercial Drop Ceiling Tiles
- Faux Tin Ceiling Tiles
- Commercial Ceiling Tiles 2x2
- Dropped Ceiling Tiles
- Decorative Ceiling Tiles 2x4
- Black Drop Ceilings
- Beadboard on Ceiling
- Decorative Sheets of Metal
Wall Panels
- Copper Backsplashes for Kitchens
- Subway Tile Tub
- Art Deco Backsplash Tile
- FRP Adhesive
- Frosted Wall
- Corrugated Steel Panels
- Bathroom Panels
- Brick Panels for Walls
- Metal Tile Backsplash
- 4x8 Decorative Wall Panels
- Bead Board Walls
- Faux Stone Wall Panels
- Copper Backsplash
- Bathroom Tile Herringbone
- Corrugated Metal Wall
- Wall Wood Paneling
Moldings
- Metal Wall Trim
- Crown Moulding Corner Pieces
- Crown Molding Inside Corners
- Crown Molding and Baseboards
- Foam Crown Moldings
- Crown Molding
- Crown Molding on Vaulted Ceiling
- Decorative Wood Corner Trim
- Wall Corner Molding
- Panel Moulding
- Modern Flat Crown Molding
- Crown Molding LED
- Dentil Moldings
- Best Crown Molding for Low Ceilings
- 6 Inch Baseboard
- 4 5/8" Crown Molding
Popular Pages
- Ceiling Medallion Rectangle
- 8 Inch Ceiling Medallion
- Loctite PL Premium
- Window Pediments
- Faux Rock Paneling
- Small Ceiling Medallions
- Corbel Wood
- What are Faux Beams Made Of
- 24 Inch Ceiling Medallion
- How Do You Attach Faux Wood Beams to The Ceiling
- Door Skins
- Light Ceiling Medallion
- Do Faux Wood Beams Look Real
- Decorative Trusses
- Ceiling Medallion Oval
- Faux Wood Beams vs Real Wood Beams